
A hose splitter can sometimes be mounted with its outlets facing down, sideways or in another orientation, but the answer depends on the exact model and the rest of the installation. The valve may operate in more than one position while the hose route, tap load, drainage and user access change substantially. Check any flow-direction arrow or orientation limit supplied by the manufacturer, then test the chosen position with the intended hoses and accessories attached. A photograph of a splitter hanging vertically is not a universal installation instruction.
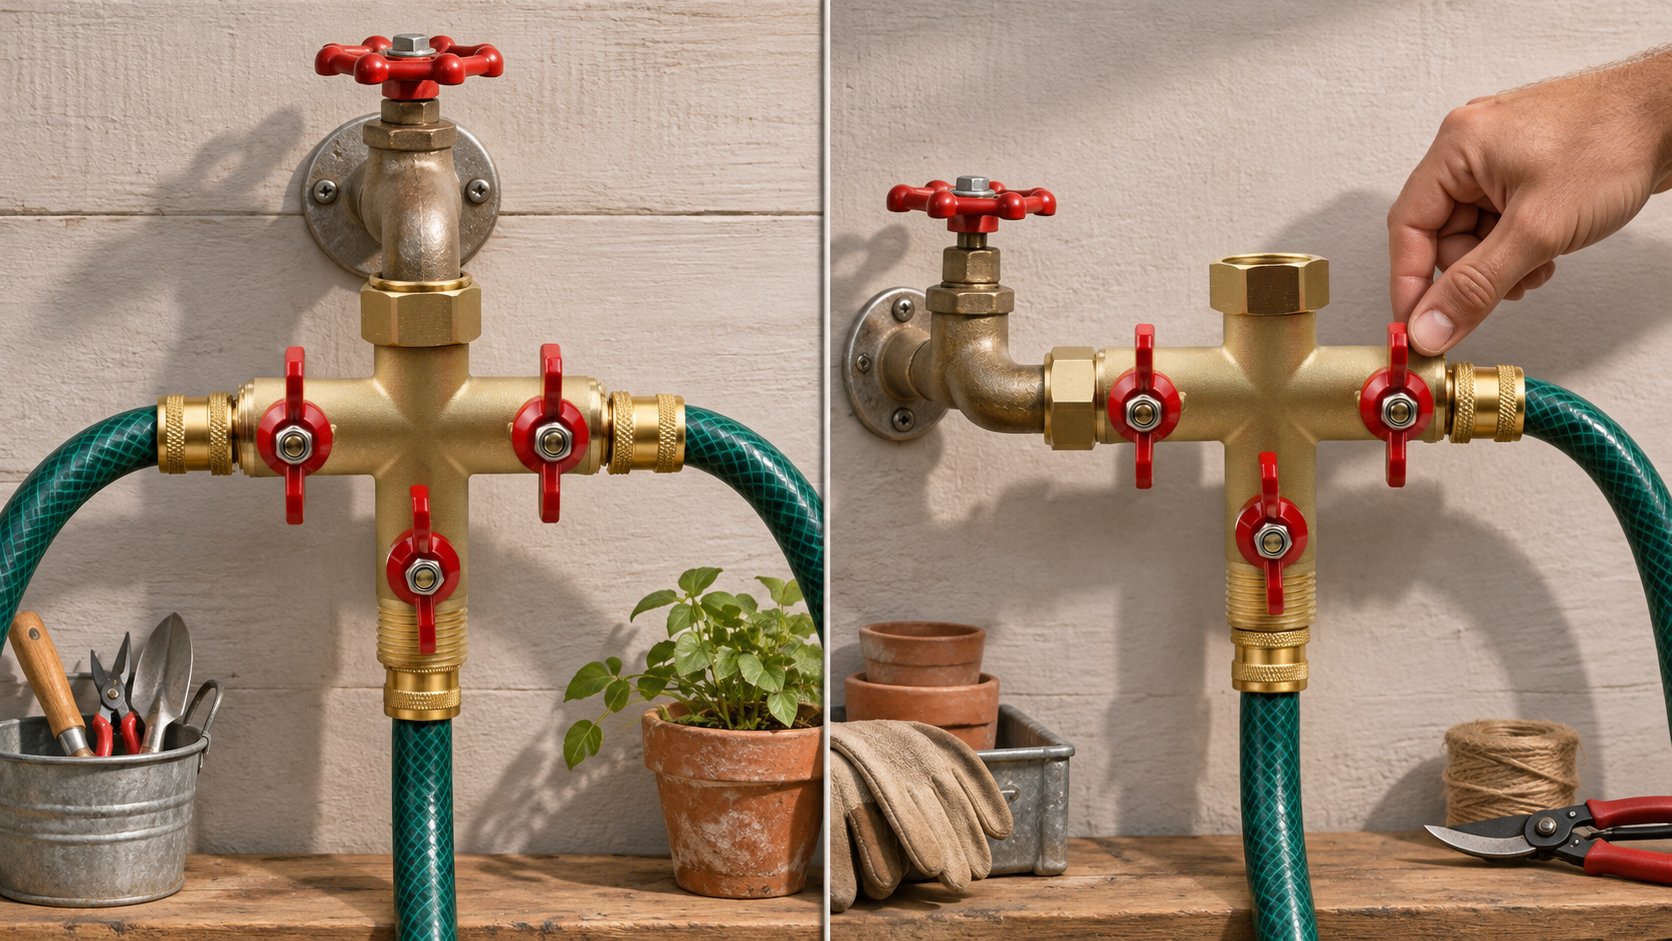
Separate valve function from installation usability
First ask whether the selected splitter’s valve and inlet design permit the proposed position. A ball-valve-style branch may move in either mounting orientation, but a model can still have limits from a swivel seal, accessory or installation instruction. Follow the exact drawing and manual. Then ask whether the user can reach every handle and whether hoses leave without a sharp bend or collision. A technically operable valve in an inaccessible corner does not make a useful kit.
Look for arrows or markings on the body and confirm what they mean. A flow-direction arrow on a different component, such as a check valve or regulator, must not be ignored merely because the splitter body itself looks symmetrical. If the splitter has no arrow, do not infer that all attached accessories are orientation independent. Timers, filters and backflow devices may have their own requirements.
| Pergunta | Vertical arrangement | Horizontal arrangement |
|---|---|---|
| Handle access | Can users reach upper and lower valves? | Can handles clear the wall and each other? |
| Hose route | Do lower hoses hang without pulling on the tap? | Do side hoses bend sharply near a wall? |
| Accessory fit | Are timers and filters allowed in this position? | Do housings overlap or block service doors? |
| Drainage and storage | Can each water path be drained before freezing? | Does a low cavity retain water? |
Account for hose force on the tap
Every attached hose, timer and connector adds weight or pull. In a vertical arrangement, several filled hoses may hang from the splitter; in a horizontal arrangement, a stiff hose may push sideways. The tap fitting should not be treated as a universal structural bracket. Route or support the hoses as appropriate for the installation, and avoid using a valve handle to reposition the whole assembly.
Test the tap-side joint after the full assembly is attached, not only when the splitter is bare. A leak that appears after adding a heavy timer may be related to misalignment or disturbed sealing. Shut off and relieve pressure before adjusting connections. Record the model and mating tap, since a result on a sturdy wall faucet may not represent a thin tank outlet or a recessed sink connection.
If the assembly will be used by a nursery crew, observe repeated hose movement during ordinary work. A hose tug can change the orientation of a swivel inlet or loosen a poorly supported coupling. Check the maker’s instructions for the swivel and retest leakage after representative handling.
Compare a narrow sink area with an outside wall
Near a narrow utility sink, the wall, basin edge, cabinet and faucet handle constrain the splitter. A horizontal layout may give better access to outlets but leave no room for a wide timer. A vertical layout may fit the body while making the lower valve hard to reach or placing a hose against the sink edge. Measure the envelope and try a sample with all accessories installed.
At an outside wall tap, there may be more room sideways but a plant bed, fence or downpipe can still constrain hoses. A vertical outlet layout can direct hoses down; it can also bunch multiple connectors below the tap. Photograph the chosen arrangement from the front and side and note the hose path, handle positions and tap clearance. Do not approve a packaging illustration based on one attractive outdoor photo.
For either location, ask whether a separate mounting or support method is needed. If a supplier proposes a wall bracket, verify it against the exact body and installation surface rather than inventing an attachment from the picture. Keep installation hardware and water-sealing components distinct in the bill of materials.
Respect direction and model-specific limits
Request the current manufacturer drawing and installation instruction before stating that a model works vertically or horizontally. The drawing should identify inlet, outlets, valve movement, swivel axis if present and any required flow direction. Confirm the target-market thread and sealing face at the tap. If a product has a built-in feature that depends on orientation, such as a drain or filter, follow its specific instruction.
Do not transfer the orientation advice of one two-way splitter to every three-way or four-way version. Outlet geometry and attached loads differ. A model revision that changes the handle or swivel may also change access. For OEM packaging, show the exact approved orientation and any support or drainage instructions instead of a broad “install any way” promise.
Plan for drainage and service
An installed orientation affects where water pools after the supply is shut off. Before freezing conditions, follow the model’s removal and drainage procedure; opening valves while the splitter remains attached does not prove every internal cavity is empty. The winterization guide provides the sequence for a removable splitter. Leave enough space to disconnect the inlet and each accessory without forcing the threads.
Service access also matters during normal use. A user should be able to inspect the tap-side washer, see a leak around a valve stem and replace a hose coupling without dismantling the whole installation unnecessarily. Mark the tightest service point in the assembly drawing. A layout that fits at installation but cannot be maintained may create avoidable returns.
Test the chosen orientation
Build a representative assembly with the actual tap, splitter, hoses, timers and connectors. Check seal engagement and handle access with the water off. Open the supply slowly and inspect the inlet, each outlet and any swivel seam, first with valves closed and then with intended branches operating. Record whether hoses pull or move the assembly. If simultaneous flow performance matters, measure at the relevant downstream points under a defined setup.
Repeat with representative production samples if the orientation will be shown as a standard use in packaging. Keep the setup photo, model revisions and test record. If an accessory maker restricts mounting orientation, that condition belongs in the kit instructions even when the splitter itself can be turned. The Hengxin splitter range is a starting point for model selection, not a substitute for its exact installation drawing.
Wholesale drawing checklist
Request overall body and inlet dimensions, outlet centerlines, valve-handle sweep, swivel range and seal type, thread callouts, installed weight of proposed accessories and any manufacturer orientation restriction. Provide the supplier with the tap or tank drawing and clearance to walls, shelves or basin edges. Ask for a sample in the proposed orientation and identify any unresolved support or drainage issue before approving artwork.
Write installation instructions for the approved layout
For a private-label kit, use photographs or a simple drawing of the actual splitter and tap arrangement tested. Name the inlet and outlet standards, show where washers sit and identify any orientation limit supplied by the maker. State how hoses should be routed or supported if the approved assembly requires it. A generic image of a bare splitter in empty space will not show the user how to avoid a wall collision or hose pull.
Include a short shutdown and service sequence: close the water source, relieve pressure, inspect a connection only after isolation and remove the splitter for seasonal drainage where required. If a timer or filter is part of the illustrated kit, refer to that component’s own mounting instructions. The splitter instructions should not silently override them. Keep the approved component models and revisions with the artwork so a future substitution triggers a review.
Customer support should request a full-view installation photo before advising a different orientation. The image can show whether the tap handle remains accessible, whether the splitter is loaded by hoses and whether a visible leak is at the inlet or an outlet. If a user must force the body against the wall to make a proposed orientation fit, choose another layout instead of asking them to compromise the seal.
Record the approved position in the kit specification so the same arrangement can be checked again when the splitter body or attached accessory changes.
Common installation questions
Can every splitter be installed sideways?
No universal answer follows from appearance. Check the exact model instructions, markings and attached accessories, then test fit and leakage in the proposed position.
Does a vertical position remove the need to winterize?
No. Water can remain in internal cavities and connected parts. Follow the maker’s shutoff, disconnection and drainage procedure.
What if hoses pull the splitter away from the tap?
Reroute or support them, shut off the supply and inspect the tap-side seal. Do not use the tap connection as an unverified load-bearing bracket.
Send the installation drawing, accessory list, target market and expected order quantity through Página de contacto da Hengxin for model-specific fit guidance.