
A leaking garden hose splitter is easiest to diagnose by locating the first wet point, not by replacing every washer at once. Dry the assembly, close the water supply before touching a connection, then observe it again first with the splitter valves closed and then with each branch running. Water appearing at the tap-side inlet points to a different joint from water emerging around an outlet, a valve handle or a crack in the body. This sequence helps distributors separate an installation issue from a part that needs replacement or supplier review.
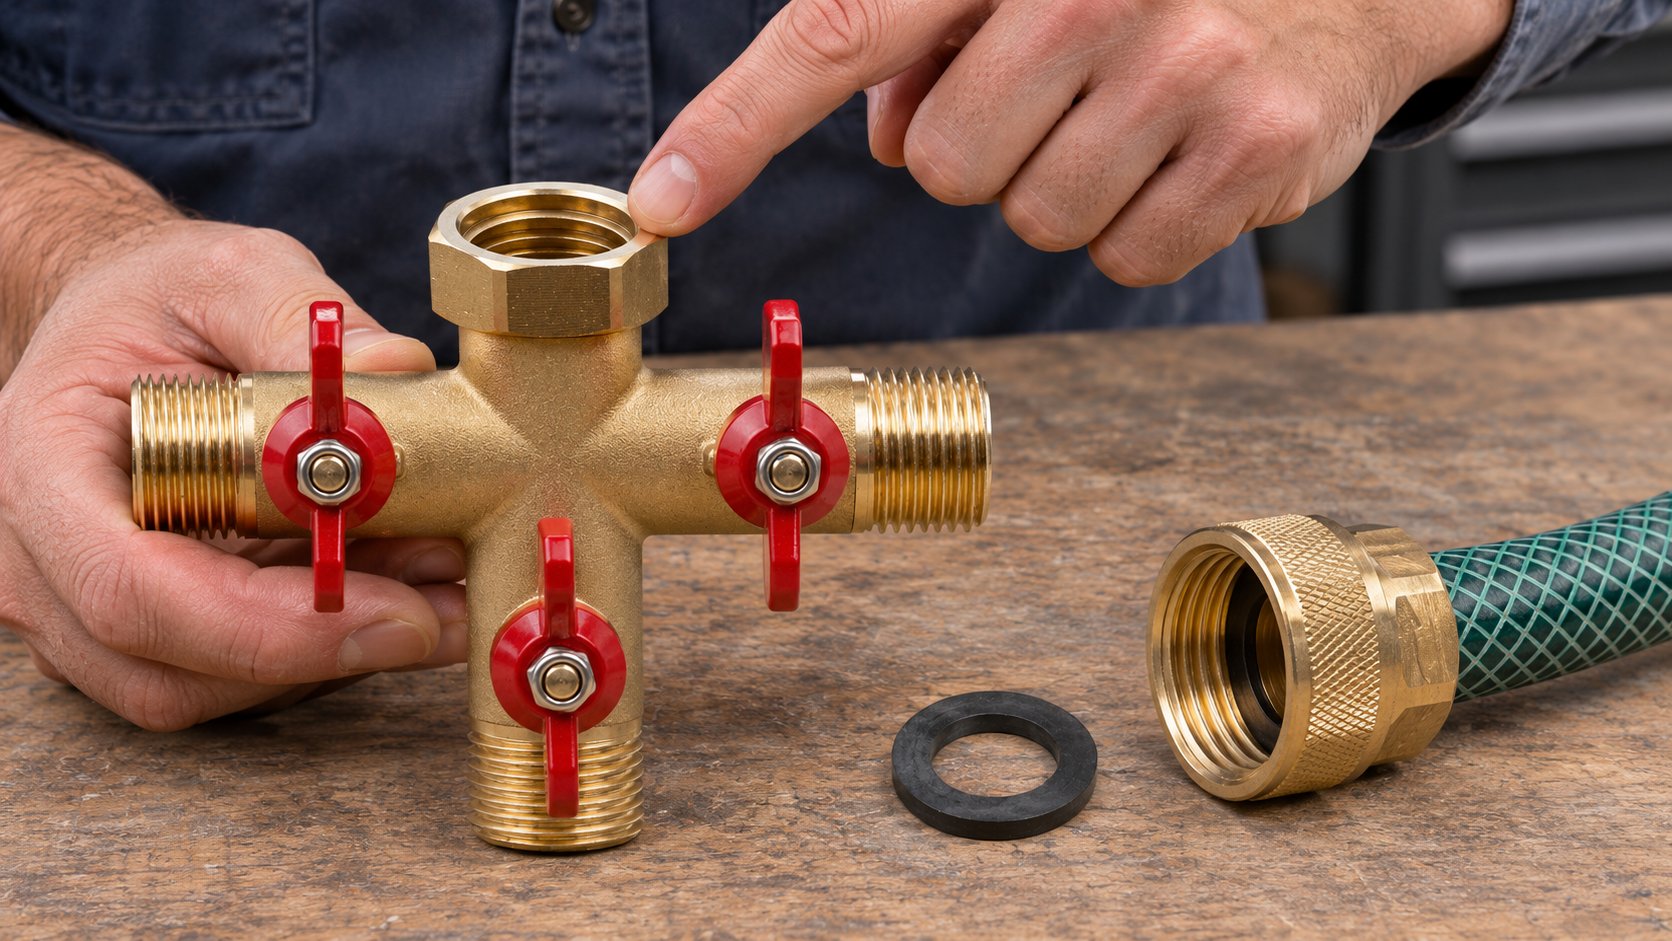
Identify the first wet point
Water travels across a brass body and down a hose. The puddle on the ground may be well away from the actual leak. Wipe the tap, splitter, valve stems and outlet couplings dry with a clean cloth. Look at the highest and most upstream part of the assembly first. A small piece of dry tissue held below a joint can reveal a drip, but keep hands away from any unexpectedly forceful spray and avoid tightening a fitting while the system is under pressure.
Observe the assembly in two states. With the water supply on and the branch valves closed, check the inlet and the splitter body. Then open one branch at a time and inspect its outlet coupling and valve area. If water appears only when a branch is flowing, the outlet joint or a component further down that branch is more likely than the tap-side washer. This is a diagnostic clue, not proof: water can run along the underside of a fitting before it becomes visible.
| First wet location | Likely checks | Useful evidence for a supplier |
|---|---|---|
| Between tap and splitter inlet | Washer position, flat sealing face, thread match and alignment | Close photograph of both mating faces and the washer |
| At a branch outlet | Outlet washer, hose coupling, adapter and branch alignment | Photograph with the branch identified and the mating hose shown |
| Around a valve handle or stem | Stem seal or valve assembly, according to the model design | Video showing which valve position produces the leak |
| Through a visible body split | Crack or freeze damage; stop using the part | Clear image of the crack and the product marking |
Check the tap-side inlet without damaging the threads
Many garden hose connections seal against a flat washer inside a female coupling. The threads bring the faces together; they are not necessarily the primary water seal. When the inlet drips, turn off the supply and relieve trapped pressure before removing the splitter. Inspect whether a washer is present, flat, clean and seated in its recess. A twisted, cut or hardened washer may fail to seal even when the coupling feels tight.
Look at the tap’s sealing face as well. A sharp burr, deep scratch or packed debris can prevent even contact. Clean loose debris gently and replace a damaged washer with the correct size and material for that joint. Do not stack several washers to compensate for mismatched threads or a distorted coupling. If the splitter starts at an angle, stops after only a partial turn or needs unusual force, confirm the connection standard before trying again.
Nominal size alone does not prove compatibility. A buyer should distinguish garden hose thread from pipe thread and regional alternatives, and should confirm both the thread form and the sealing face on the exact product. The existing GHT, NPT, BSP and hose barb guide explains why close-looking interfaces should not be mixed without checking their drawings. If the inlet is visibly damaged, document it rather than forcing a replacement coupling onto it.
Trace an outlet leak through the complete connection
At an outlet, the first question is whether water comes from the splitter’s outlet face or from the hose, timer, quick connector or adapter attached to it. Dry and inspect the entire branch. Turn off the water, disconnect the accessory and examine its washer, mating face and threads. Reconnect it squarely. If possible, compare with a known compatible hose coupling under the same conditions. A leak that follows one accessory to another outlet suggests a problem with that accessory; a leak that stays at one outlet deserves closer inspection of that outlet.
Check any quick-connect assembly separately. Its plug-and-socket seal is different from the threaded washer at the splitter. A damaged O-ring, debris or a plug that does not lock fully may create a leak even though the threaded part is sound. Do not assume that two brands’ quick-connect parts are interchangeable merely because they push together. Record the exact mating components used during the test.
If the branch carries a timer, consider its weight and alignment. A heavy timer can put bending load on a tap-side assembly. A leak that appears only after the timer is mounted may be related to a disturbed seal or mechanical stress. Support the assembly as appropriate and check the installed geometry before deciding that a new washer alone has solved the problem.
Distinguish valve-stem leakage from a closed-outlet drip
A valve-stem leak appears around the handle shaft or the point where the control passes into the body. A drip from the free end of a closed outlet has a different path: it may indicate that the valve does not close fully, or that water remaining downstream is draining after shutoff. Dry the two areas separately and observe them over time. Check one valve at a time so the branch responsible is clear.
Do not dismantle a valve while connected to a pressurized supply. Some models may have serviceable seals; others are sealed assemblies. The correct next step depends on the part number and manufacturer instructions. If the stem seal is not a documented service item, or if the leak returns after a model-approved repair, remove the part from use and ask the supplier to review it.
For distributors, it is useful to record whether leakage occurs with the valve open, closed or moving. A short video can show the position and rate of leakage better than a still photograph. It should also show the inlet supply and any attached outlet hardware so the supplier can reproduce the configuration.
When replacement is the safer decision
A cracked splitter body is not a washer problem. Stop using the assembly, disconnect it after shutting off and relieving the water supply, and replace the part. Adhesive, tape or extra tightening cannot restore a reliable pressure-containing body. Cracks can follow freezing of trapped water, impact or damage from excessive force, but the cause should not be guessed from appearance alone. Photograph the crack, markings and installation before discarding the unit if a supplier investigation is needed.
Severely stripped threads, a distorted sealing face or a valve mechanism that cannot be operated normally also call for supplier review or replacement. A minor scratch and a structural defect are not the same; the relevant question is whether the mating connection and water-containing part can still function within the product’s documented conditions. If that cannot be verified, do not keep it in service simply because a temporary fix seems to stop a drip.
Give a supplier enough information to act
For one customer complaint, capture the model or product marking, purchase batch if available, target market, tap and accessory types, and the first wet location. Include photographs of the whole installation and a close view of the suspected joint. A useful video shows the dry start, water supply opened, branch valve positions and the exact moment leakage begins. Record whether the problem occurs on more than one sample and whether swapping a hose or washer changes it.
For repeated returns, keep samples from different batches and record the same test setup for each. This can distinguish an installation trend from a possible product issue without inventing a failure rate. Ask the supplier for the selected model’s drawing, washer specification and applicable leak-test method. The garden hose splitter range is the place to compare current outlet layouts; the leak diagnosis should remain tied to the actual item and connection used.
Questions buyers and service teams ask
Can a washer fix every splitter leak?
No. A correctly sized washer can solve a leak at a washer-sealed connection when the mating faces and threads are sound. It will not repair a cracked body, damaged valve stem seal, mismatched thread or leaking quick-connect O-ring.
When should a cracked splitter be replaced?
Remove a splitter with a visible crack in the water-containing body from service. Shut off the supply, relieve pressure and document the damage before replacement or supplier review.
Which photos help a supplier diagnose the leak?
Send one view of the whole installed assembly, a close view of the first wet point, the mating connection and washer, and the product or batch marking. Add a short video showing the valve positions when the leak appears.
If you are selecting or reviewing a splitter for a wholesale range, send the model, destination market, mating connections, expected order quantity and the diagnostic images to Hengxin’s team. Ask for model-specific drawings and test information before making a compatibility or leak-proof claim in your own product listing.