
When a garden hose quick connector leaks, first locate which interface is wet. A threaded tap adapter, the plug-and-socket joint and a water-stop valve have different seals and failure paths. Dry the assembly, isolate the water before disconnection, then observe the first wet point in a controlled sequence. Replacing every O-ring at once can hide a mismatched plug or an incompletely seated hose. For a distributor handling returns, a few precise observations are more useful than the statement “the quick connector leaks.”
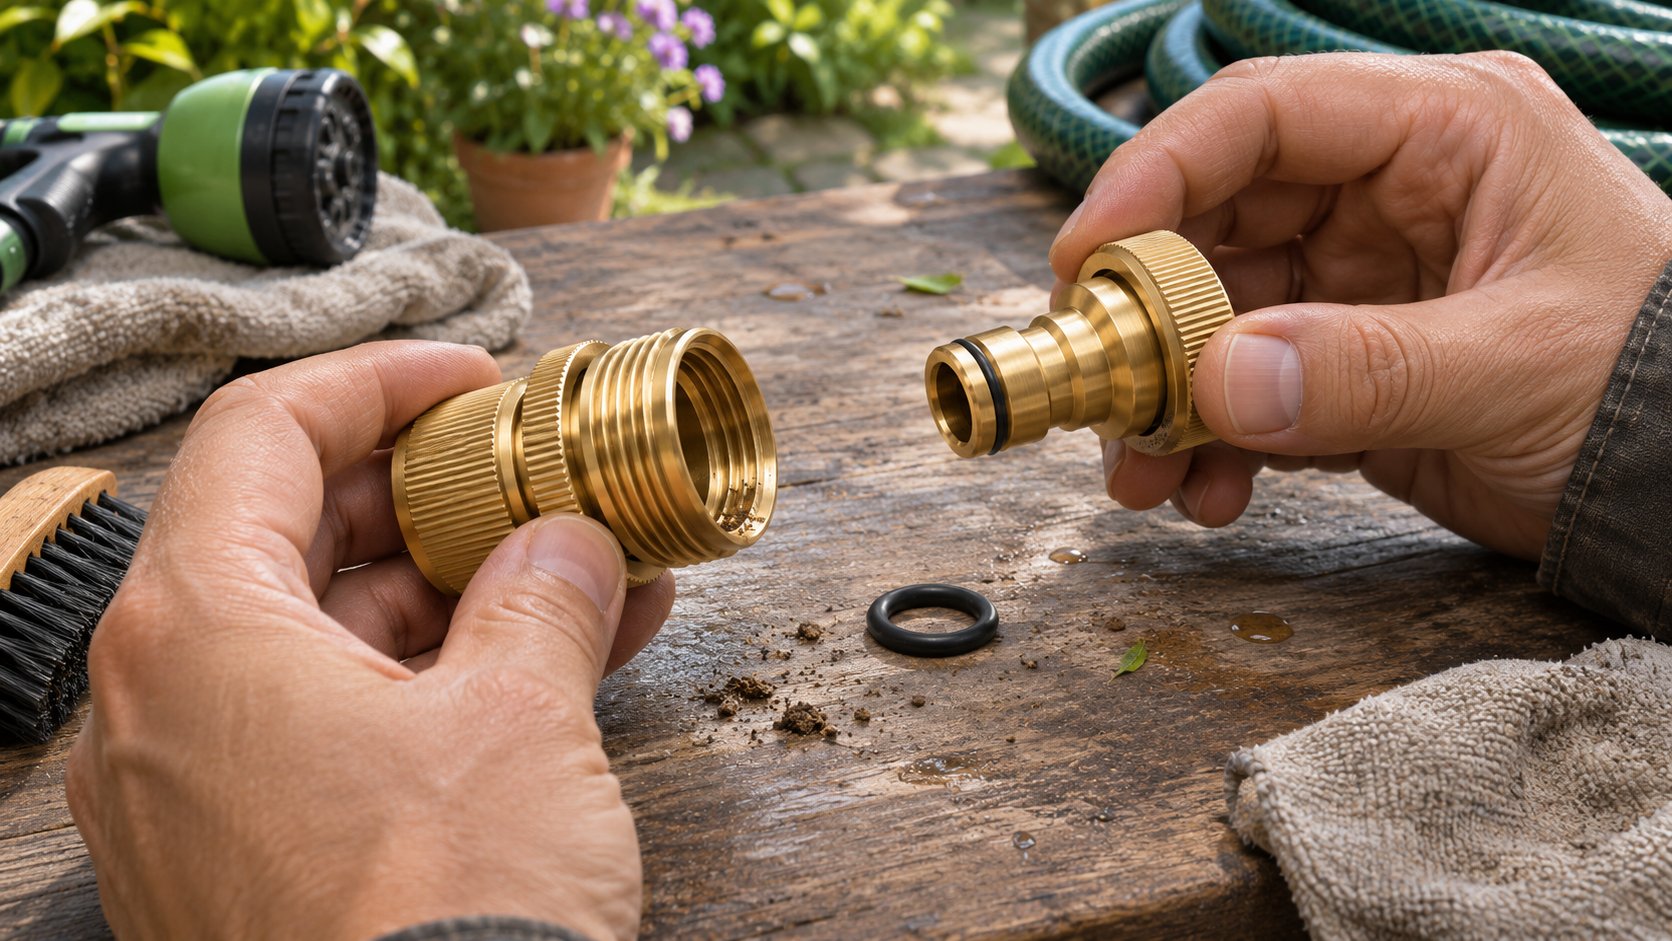
Map the three possible leak locations
At the threaded end, water can escape between a tap or accessory and a threaded adapter. Check the thread system, flat sealing face and washer or other seal specified for that connection. At the quick-connect joint, water may emerge around the plug where it enters the socket. That points toward the mating profile, O-ring, debris or locking depth. At the hose attachment, seepage can travel under a clamp or coupling and appear near the quick connector even though the plug and socket seal correctly.
A water-stop socket adds another path. When the tool is removed, an internal valve is intended to close the hose-end outlet. If water continues to drip from that outlet, check whether it is residual water draining or leakage past the valve. If the socket leaks around its exterior only while the plug is connected, treat that as a different symptom. Keep the state of the plug and water source in the record.
| First wet point | Likely checks | Evidence to record |
|---|---|---|
| Threaded tap or adapter joint | Thread match, washer, sealing face and alignment | Close views of both mating parts and the seal |
| Plug entering the socket | O-ring, plug profile, insertion depth and lock | Both model numbers and a photo of the engaged pair |
| Hose entering the connector | Hose size, cut end, barb or clamp assembly | Hose dimensions and an unassembled view |
| Open end of disconnected water-stop socket | Residual drainage or valve-seat leakage | Video showing time since disconnection and drip rate |
Use a dry-start observation
Shut off the tap, relieve pressure and wipe all connections dry. Check that the hose, plug and socket are the intended parts, then assemble them without forcing a misfit. Open the water slowly and watch the tap-side joint first. If it stays dry, look at the hose attachment and then the plug/socket seam. For a water-stop model, observe the joined state and, with care, the state immediately after a normal release. Do not dismantle or replace a seal while the line is pressurized.
Use a piece of dry tissue beneath a joint to detect a small drip, but avoid touching a forceful spray or putting fingers near an unexpected release. Water may run down the outside of a connector, so the lowest wet spot is not necessarily the source. A short video beginning with a dry assembly and showing the exact point where moisture first appears helps remote support teams avoid that mistake.
Test one change at a time. If a new washer is installed and the plug is changed at the same moment, the successful retest does not reveal the cause. Compare with a known compatible pair if the supplier can provide one. If the leak follows one plug to a second socket, the plug or its seal deserves closer attention. If it remains with one socket, inspect that socket. These are clues, not a substitute for a controlled test.
Inspect the O-ring and sealing surfaces
Turn off the water and remove the plug according to the connector instructions. Locate the O-ring specified for the model. Look for a cut, flattened section, twist, missing segment, dirt or an O-ring that has slipped out of its groove. Check the mating surface for grit or a burr. Clean accessible debris with a method approved for the material. Replace an O-ring only with the size and material specified for the exact product; a ring that looks close can be too thin, too thick or incompatible with the intended use.
Hozelock’s troubleshooting guidance identifies correct tap connection and the condition of O-rings as checks for its own hose fittings. This supports a diagnostic step, not a claim that one maker’s seal fits another. A distributor should obtain the connector supplier’s service part number and replacement procedure before listing an O-ring as user-replaceable.
Do not add layers of tape or oversized seals to make a quick-connect plug fit. The plug/socket interface is designed to lock at a defined depth. Extra material can prevent full engagement or damage the latch. At a washer-sealed garden hose thread, tape is also unlikely to fix a damaged flat sealing face or a missing washer.
Check plug profile and locking depth
Look at the plug and socket together. A compatible plug should enter to the intended stop, engage the retention mechanism and release normally. A shallow connection may leave the seal outside its working position; a plug that requires excessive force may have the wrong profile. Do not infer compatibility because a part clicks once. Compare dimensions against the supplier drawing and test the actual pair under water.
Distinguish mismatch from wear. A new mixed-brand pair that leaks from its first use may be dimensionally incompatible, while a pair that previously worked and now fails after many connections may have a worn seal, damaged plug or latch. A production batch can also differ from an approved sample if a component was revised. Record model, revision, batch and use history before assigning cause.
If the connector is mounted on a hose, inspect the hose cut and attachment. A slanted cut, wrong hose bore or poorly positioned clamp can create a leak that appears to come from the socket sleeve. Compare the hose dimensions with the connector’s specified range. The hose-to-barb fit and the plug-to-socket fit are separate engineering checks.
When to service and when to discard
A loose or damaged replaceable washer or O-ring can be serviced if the maker supplies the correct part and procedure and the mating surfaces are sound. Clean grit from an accessible seal face, reassemble and retest. Keep any service claim narrow: specify the model, part number and retest condition. Some water-stop mechanisms are not intended for field disassembly. In that case, a leaking internal valve needs supplier review or replacement rather than an improvised repair.
Discard or remove from use a connector with a cracked pressure-containing body, stripped or deformed threads that cannot hold a sound connection, a broken latch that may release unexpectedly, or a damaged sealing surface that cannot be restored under the maker’s instructions. A temporarily reduced drip does not make a structural defect safe. Shut off and relieve pressure before removing the part, and retain photographs and the sample if a warranty or supplier investigation is needed.
The adjacent open-flow versus water-stop guide explains how connector state affects what you see after disconnection. Use that distinction before labeling a few drops of residual water as a failed stop valve.
A returns template for brands and wholesalers
Ask the customer for a photo of the entire tap-to-tool assembly, one close view of the first wet point, and a photo of the disconnected plug, socket, O-ring and hose end. Record the connector and mating-part models, any adapter, hose size, purchase or batch identification, approximate use history and whether the leak occurs only when connected or also when disconnected. A video should show the dry start and the timing of the drip.
For repeated complaints, compare samples from more than one batch under the same setup. Retain the supply condition, plug/socket pair and observation duration. If the supplier provides leak-test criteria, use those rather than inventing a pass rate from a handful of returns. A diagnosis tied to the first wet point makes corrective action more focused: seal specification, plug geometry, hose attachment or valve mechanism.
إن Hengxin connectors and fittings range can help identify candidate assemblies. Request drawings and approved mating pairs for the exact models before claiming universal fit or transferring a service procedure between products.
Keep a separate record for any field repair. Note the replacement seal used and whether the joint passed the same check that exposed the original leak.
Questions about leaking quick connectors
Why does the connector leak only with one nozzle?
The nozzle’s plug profile or seal may differ, or it may not lock to the proper depth. Compare the exact plug and socket models and test with a known compatible plug.
Can a new O-ring solve every quick-connect leak?
No. It may solve a seal-specific leak on a serviceable model, but it will not correct a mismatched plug, broken latch, damaged body or leaking hose attachment.
Does a drip after disconnecting prove the water-stop valve failed?
Not immediately. Residual water in the exposed part may drain. Record how long the drip continues and whether the upstream hose remains under pressure, then follow the model’s test procedure.
For a wholesale or OEM review, send the complete mating-part list, target market, leak images, batch details and expected order quantity through Hengxin’s contact page. Ask for model-specific seal details and leak-test criteria.